Table of Contents
5 things to do after installing Windows 10
It’s pretty easy to get started with Windows 10, but for the best experience, there are some important things to do after installing Windows 10. This will take a little while, but it should help you get a smooth experience. than.
Let’s look at the first things you should do after installing Windows 10. These are the most important things when installing this operating system for the first time, but also worth checking out after installing a major feature update. .
-
Run Windows Update and configure update settings
Even though you just installed Windows 10, chances are some recent updates are pending. You should install them immediately to make sure you have the latest features and security patches.
To check for Windows updates, open the Settings app and go to Update & Security> Windows Update .
On this page, click Check for updates and give it some time. After a while, Windows Update will begin to download and install the updates. If there are any restart requests, you’ll see a prompt to do that.

Windows Update runs automatically in Windows 10. Although this means you will do less manual work, it can also be annoying if it interrupts your work. Refer to the article: How to disable Windows Update on Windows 10 if needed.
-
Upgrade hardware drivers
A device driver is software that controls how a particular device behaves when it is connected to a system. In other words, the driver allows Windows to communicate with the hardware properly.
Drivers are often provided by hardware manufacturers and like most software, they are not always perfect. Sometimes drivers fail or see updates that are compatible with the latest versions of Windows.
Keeping your drivers up to date is crucial to making sure your hardware runs at optimum performance. Windows will install generic drivers for devices like the keyboard and mouse, but you should also know how to update other important drivers, such as the display driver.
-
Change default Windows Settings
The default settings that come with Windows 10 are not optimal for everyone. They are usable, but you will get a better experience if you tweak them.
There’s a lot to manage in Windows 10’s Settings app, so let’s take a look at some of the key changes suggested after installing Windows 10.
Adjust default apps
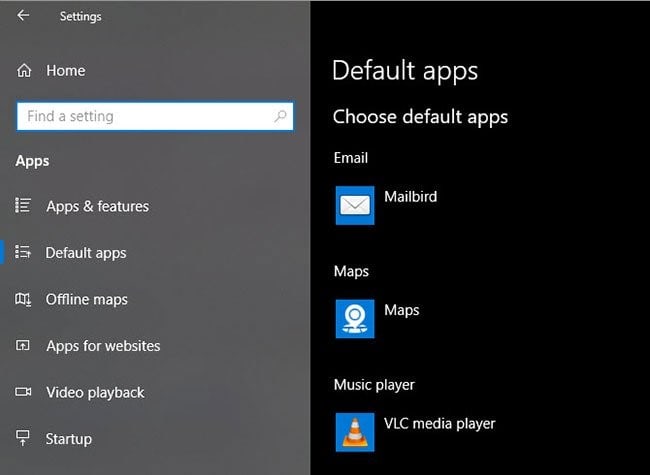
After installing your favorite apps, you should set them to run by default. To change the default pre-set apps in Windows 10, do the following:
- Go to Settings> Apps> Default apps .
- Select favorite applications for each category, including Email, Music player, Web browser , etc.
- Click Choose default apps by file type to associate different programs with other file types, such as PDF, DOCX and TXT.
Disable unnecessary startup items
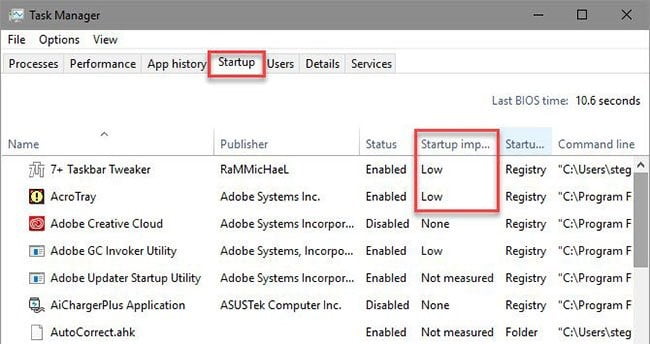
Many applications automatically set up to run at startup, which wastes resources and takes longer to boot the computer. After you install the software, you should ensure that only approved applications run at startup.
Optimize Power Plan settings
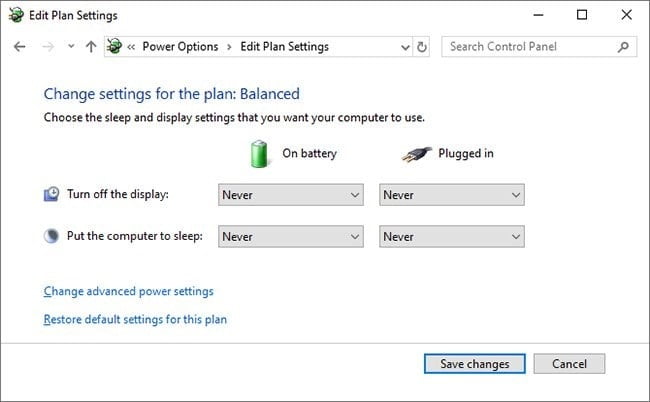
Windows 10’s Power Plan settings allow you to fine-tune various aspects of your operating system related to energy usage. This is important to help laptop users save battery life, but there are also settings useful for desktop users.
You can adjust your Power Plan using the following steps:
- Go to Settings> System> Power & sleep .
- On the right side, select Additional power settings to open the Power Optionssection of Control Panel.
- You will see several options, including Balanced, Power Saver and High performance . Choose the one you want, then click Change plan settings on the right to modify.
- Select the amount of time that elapses before the screen turns off and the computer goes into sleep mode. Then click Change advanced power settings for more options.
- While you can review everything here, pay special attention to the settings under Hard disk, Sleep, Power buttons and lid, Processor power management and Display.
- Click OK to save the changes.
Turn on Night Light
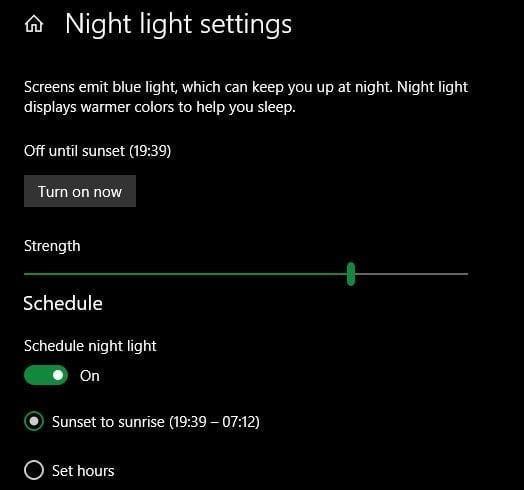
Windows 10 includes a built-in feature that makes the display appear warmer at night. This helps reduce blue light, makes you awake and makes your computer less glare when you work late.
Read More : How to remove a system restore point in Windows 10
-
Set up a backup plan
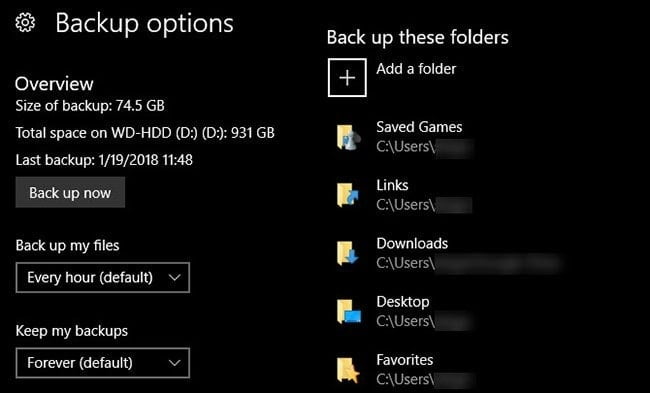
You don’t want to go through all of this setup and then let your computer crash or damage your hard drive. It is important to back up your data regularly to protect it from dangers.
-
Personalize Windows 10
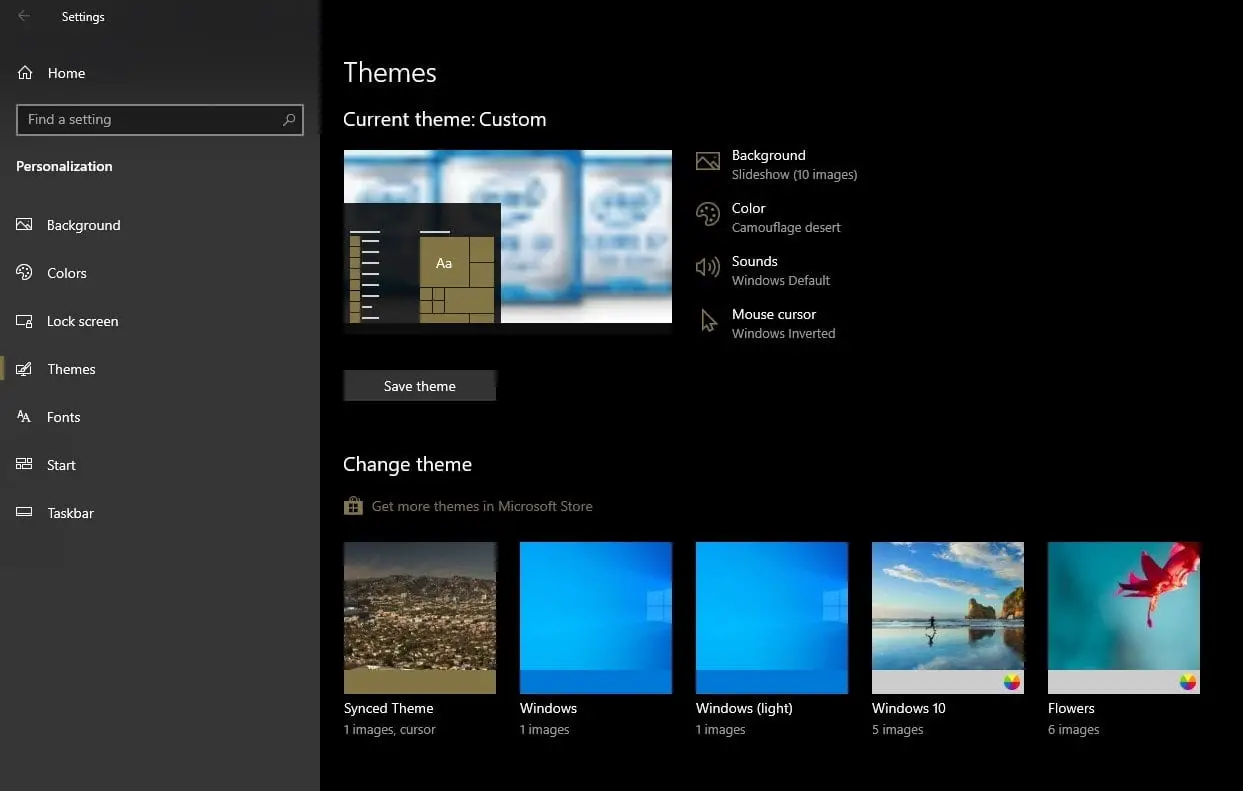
While this isn’t as important as the other options above, you should still take some time to customize your desktop after installing Windows 10. It’s great to have a new wallpaper, mouse pointer. and other small personalization tweaks to help the system become more familiar and familiar.